Use your own good mechanical sense. Examine everything with care. I have not covered a few things (like R+R on the light assembly). I do some things the way I like to do them. This may or may not be the way you like to do them or the way anybody likes to do them. Sometimes it's hard being the only person who's right but I've learned to live with it.
Note: I'm not associated with Hyper-Lite (www.hyperlites.com), the people who make Hyper-White lights. I bought my kit, part number HL-WDFW16, from Blue Moon Cycle. Nice folks but I'm not associated with them either.
Click any image to make it larger.
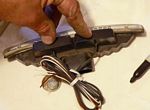 |
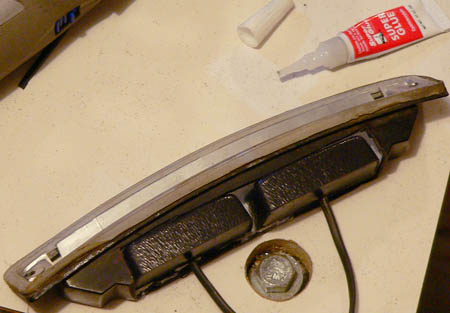
Remove the lamp assembly from the fairing per instructions in your Haynes, Clymer or BMW manual. Remove the lens and set aside. Don't lose the screws and washers. Set the Hyper-White modules on top of the case and mark their position. The top of the modules will project slightly through this surface and the modules are tapered. You might want to turn them over so the top of the modules is against the top of the light housing for a closer layout. |
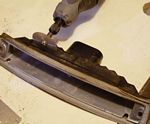 |
Use your scariest Dremel saw and cut across the top of the housing and down the back. Then cut along the edge between the back and the bottom. This gets a little strange at the lamp holder area. Just whack away as needed on the parts you are going to be throwing away and then cut your final line. |
 |
Now you have a cutaway for the LED modules and a surface to mount them to. Clean up the edges with a file. Save the old lamp holder for another project. |
 |
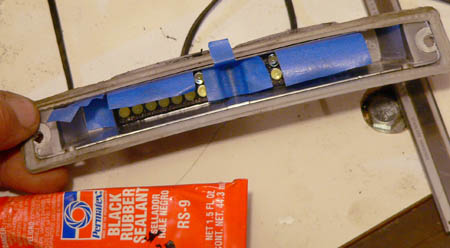
Remove the double stick tape from the bottom of the modules. There isn't enough clearance for it. Hold the modules in place and check the fit in the fairing. If all is good clean surfaces with alcohol and glue them in place with a drop of Superglue. |
 |
Mask larger gaps and cracks from the inside to keep the sealant out of the interior. |
 |
Seal the modules in from the back with Silicone or rubber adhesive. The Rubber adhesive has a lot of solvent in it, mostly toluene. It's fast drying but I won't swear that it's won't soften the plastics involved.
|
 |
I installed the switch under the edge of the dashboard near my left hand. You want to keep your right hand on the throttle, right? The thing is also rather ugly and looks best mostly out of sight.
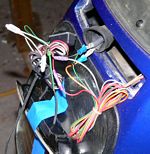
The power and ground plug in to the leads that went to the original lamp. No changes (like taps) to the bikes wiring are required. The rest of the wiring is per the Hyper-Whites instructions. I like to leave extremely long service loops in my installations. Here I can remove the dash and set it well aside without having to pry off the switch. You could cut out a lot of wire however if you wanted.
The Hyper-Whites kit had some slick little connectors but I prefer my own crimp type. This is a pretty protected location.
|
 |
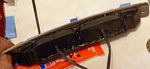
Everything bundled up and ready to stuff in on top of the headlight. |
 |
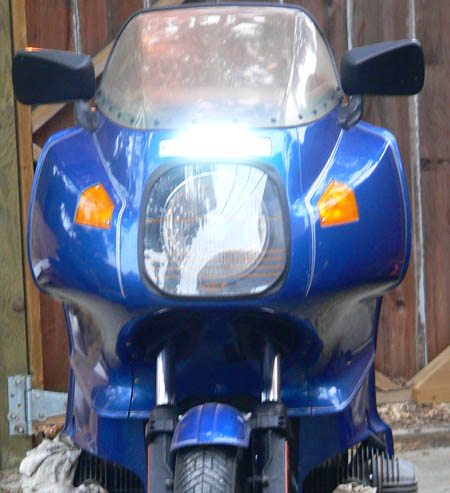
The light slides back into the fairing. Nothing is turned on here, that's just the camera flash.
Replace the lens and screws. |
 |
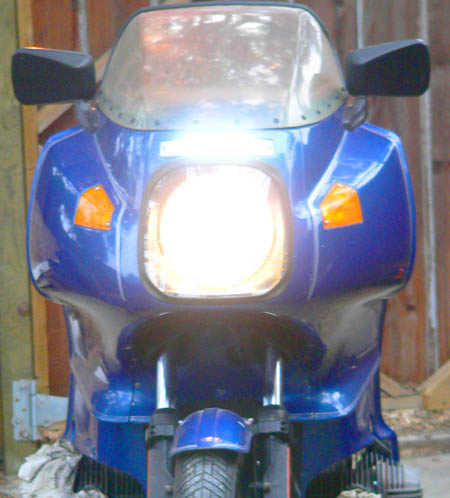
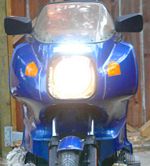
Oh my!. These things live up to their billing. Just a bit under the threshold of painful-to-look-into. The modulation is very effective at getting attention in peoples rear view mirrors. (a strip of red lens tape could be handy too in the proper circumstances :-) |
 |
Hyper-Light alone |
 |
With the low beam |
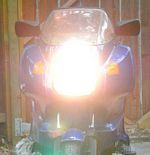 |
With the high beam. |