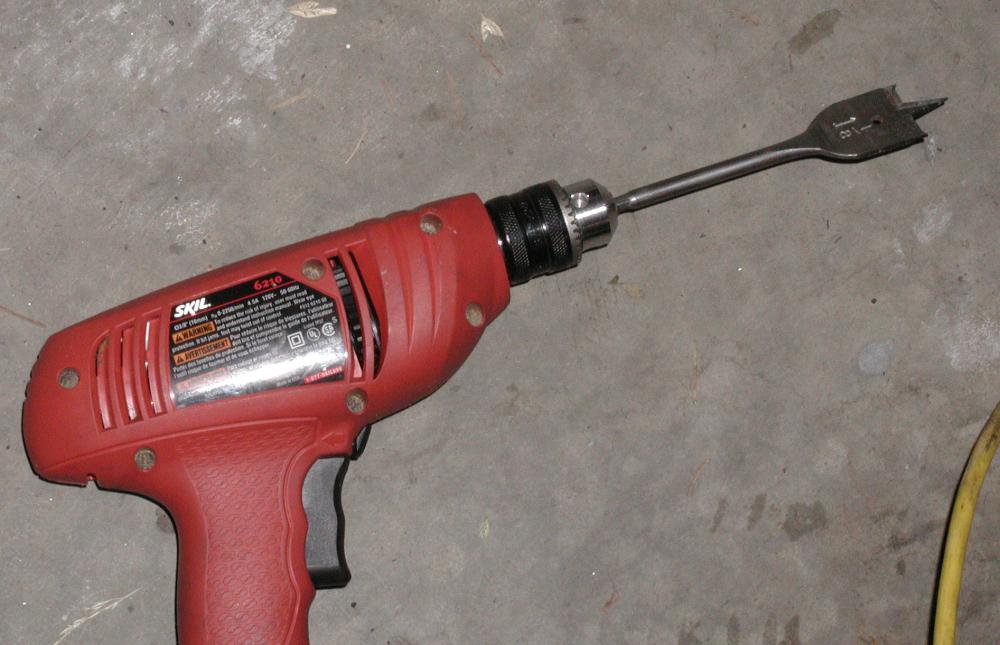
 Hole saw (optional)
This is part of a series of articles describing some work I did on my Honda S2000 in Dec 2004. Since I did several things all at once, the pictures and descriptions may not be exactly what you would see and do if you were to do this job by itself. Use proper tools, safety techniques, parts, and judgement. These descriptions and pictures are (to the best of my ability) accurate representations of what I did, but they do not constitute a recommendation for what you should do. If you are in any doubt about your ability to do this work, have the work done by a professional.
I decided to install front brake ducting.
Hole saw (optional)
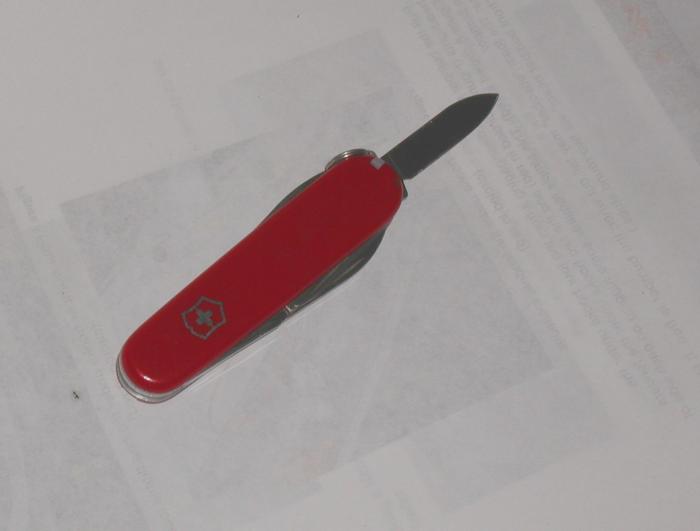 The most feared of terrorist weapons
Zip-ties (14 inch length)
Pop rivet tool
Drill
Dremel tool (with cut-off wheels)
Scroll saw (to cut holes in bumper and trim inlet ducts)
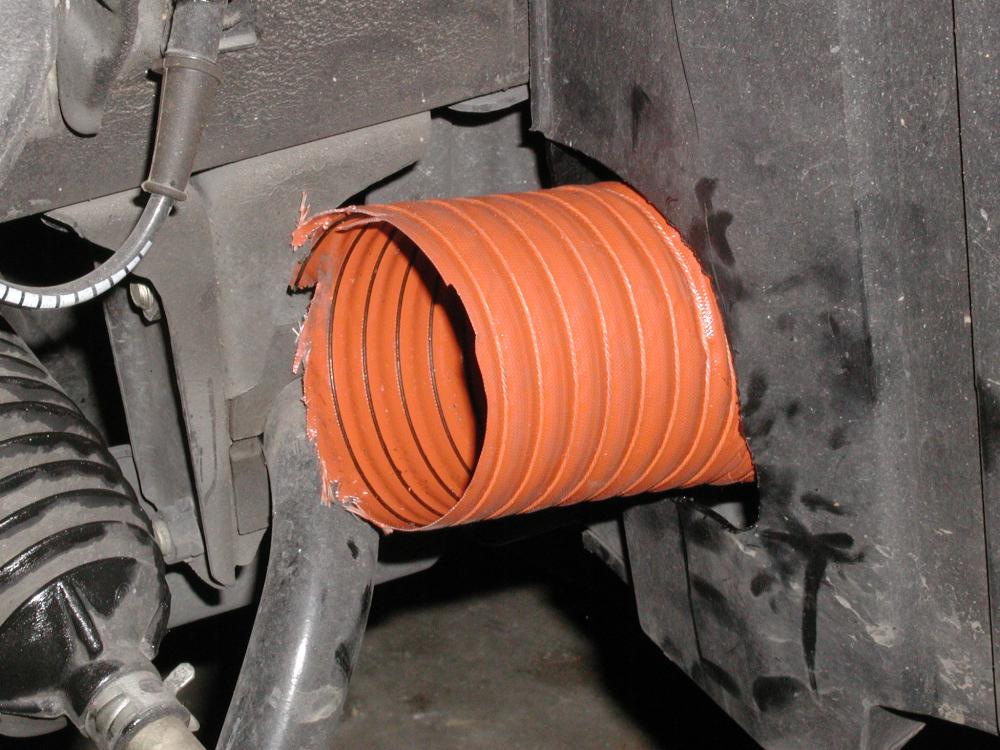 Silicone flex duct (2 or 3 inch
diameter), available from race supply shops or airplane supply shops, about 10 feet of it
Silicone flex duct (2 or 3 inch
diameter), available from race supply shops or airplane supply shops, about 10 feet of it
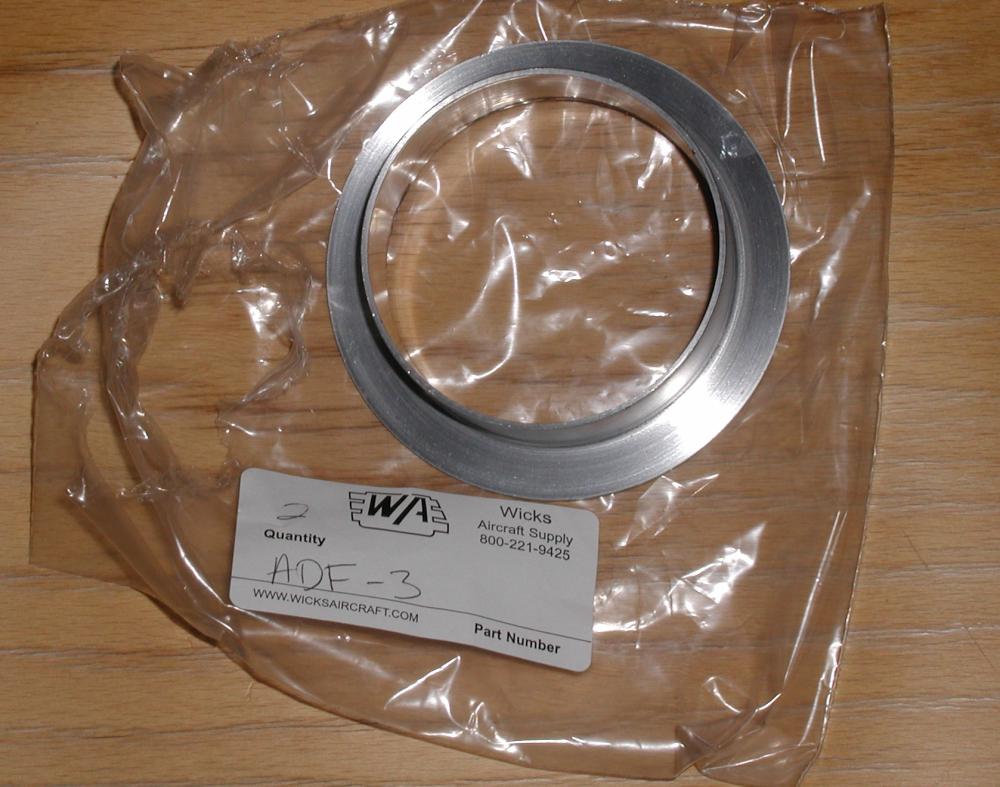 Aluminum flanges to fit your ducting, 2 or 4
(if you use them up front), available from airplane supply shops
Aluminum flanges to fit your ducting, 2 or 4
(if you use them up front), available from airplane supply shops
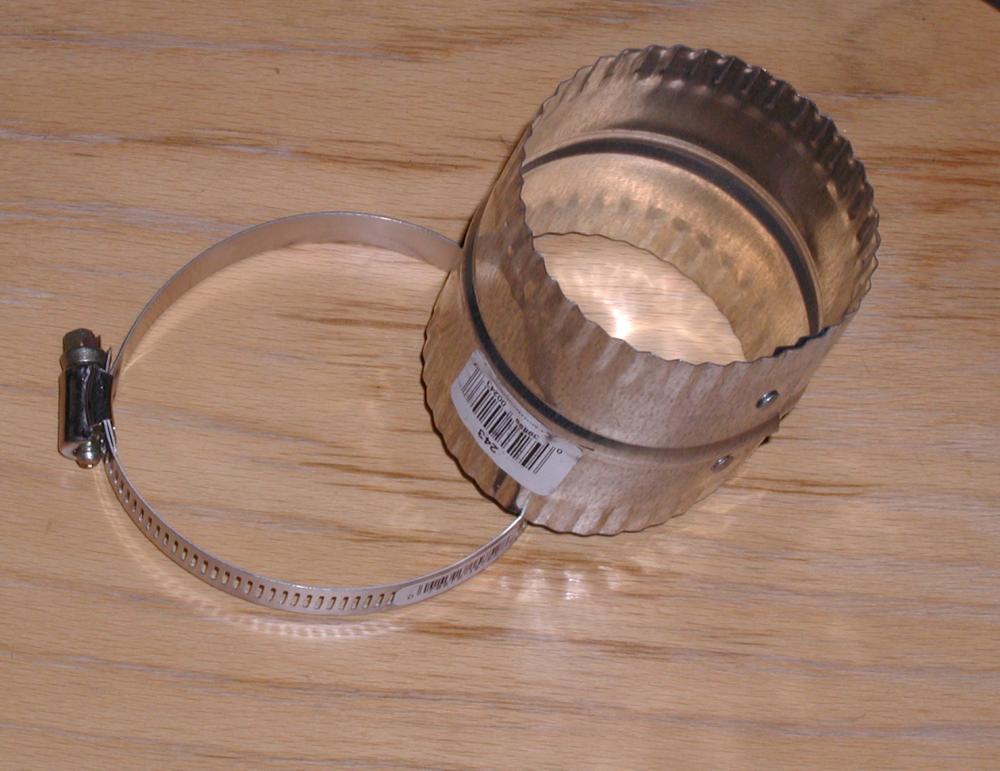 Hardware to splice and clamp your ducting,
available from larger hardware stores
Hardware to splice and clamp your ducting,
available from larger hardware stores
Inlet ducts (if you don't just use the flanges), available from race supply shops or airplane supply shops
RTV (possibly)
I am going to tell you what I think SHOULD be done. When I did something else, I will mention it. The first step is to choose what size of ducting. I used 3-inch, but perhaps 2.5 inch would be better. It would definitely be easier to install, but it will probably mean less airflow. (That may not be a bad thing, anyway.)
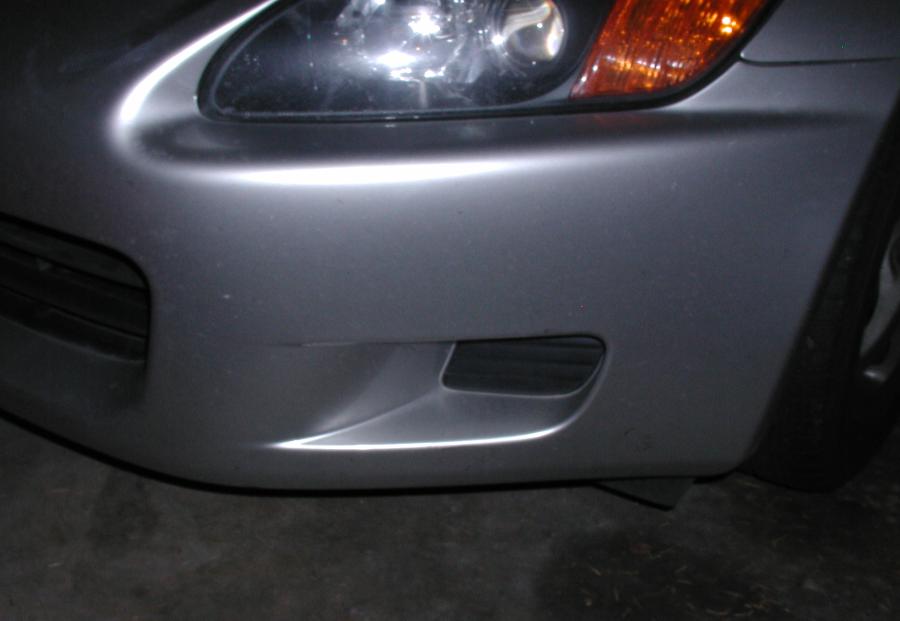 The next choice covers how you get the air
into the ducts. I will assume an 00-03 S2000, which has some conveniently located faux brake duct inlets. What I did was buy some
injection molded ducts and cut them to fit the faux duct opening. In retrospect, I think a better option would be to just cut a round
hole in the back of the faux duct and install a flange to clamp the ducting onto. That takes less skill and may work better anyway. I
wish I had done it that way.
The next choice covers how you get the air
into the ducts. I will assume an 00-03 S2000, which has some conveniently located faux brake duct inlets. What I did was buy some
injection molded ducts and cut them to fit the faux duct opening. In retrospect, I think a better option would be to just cut a round
hole in the back of the faux duct and install a flange to clamp the ducting onto. That takes less skill and may work better anyway. I
wish I had done it that way.
The final decision is to figure out how you will attach your ducts to your wheel. Most people have chosen to attach the ducts to the dust shield. Major variations are possible. I expanded one of the "gilled" openings in the dust shield, but didn't cut it to be a full three inches in diameter. Others have just used the small gills, while others have cut away the full three inches. Obviously, the bigger the hole the more airflow. But you probably want your airflow concentrated at the hub of the rotor, where the vented disk inlets are located. It is up to you.
At one time I was thinking of borrowing an idea from Ray and using wire to sew the ducts to the dust shield (and even drilled holes for this purpose). But instead, I decided to rivet a flange to the back of the shield. This involves match-drilling holes in the shield and the flange for the rivets.
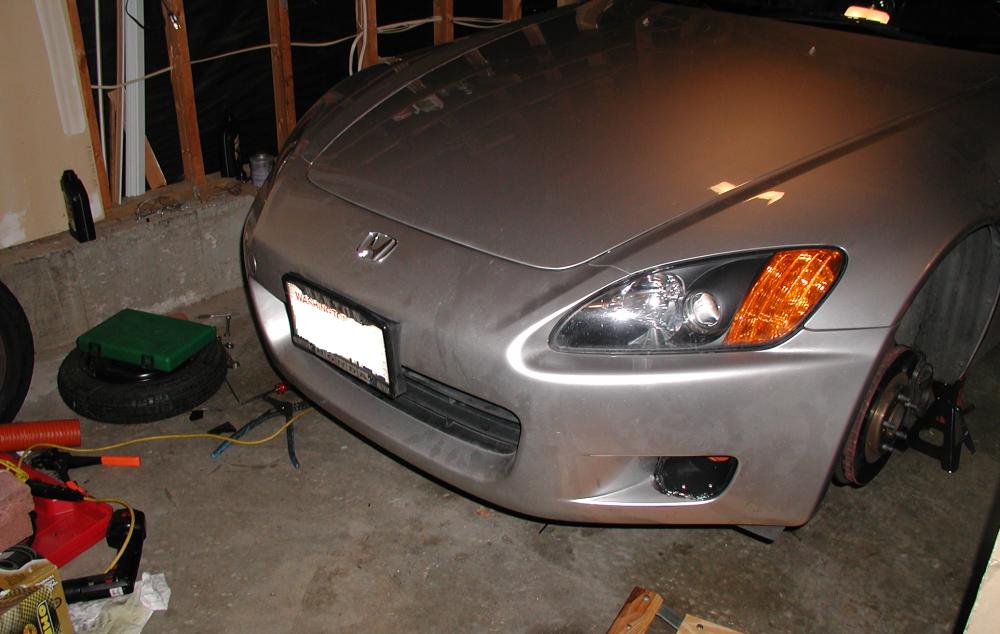
Then you start! Put the car on jacks (as high as you can) and remove the front wheels and brake rotors. You have to remove the calipers to remove the rotors, but you could put the calipers back on to hold them in place. Since I was also replacing my brake hoses, I just left them off for most of this.
 Next remove the front bumper cover. There are good
instructions available for this (ignore the part about removing the headlights, etc. -- just take off the bumper cover).
Next remove the front bumper cover. There are good
instructions available for this (ignore the part about removing the headlights, etc. -- just take off the bumper cover).
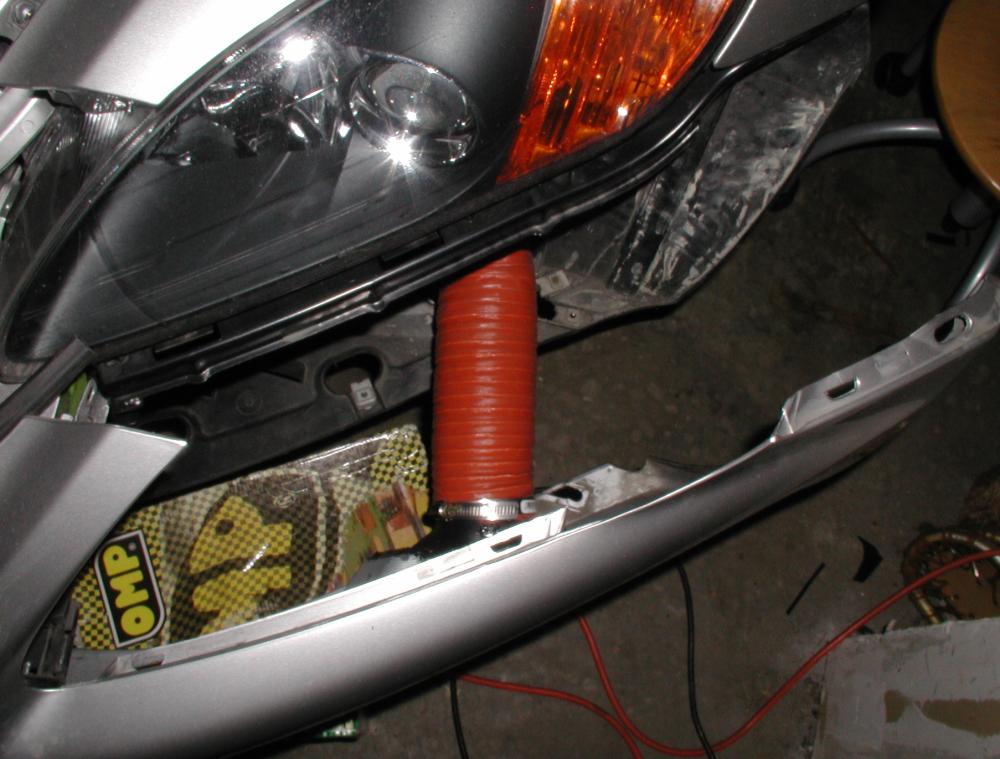
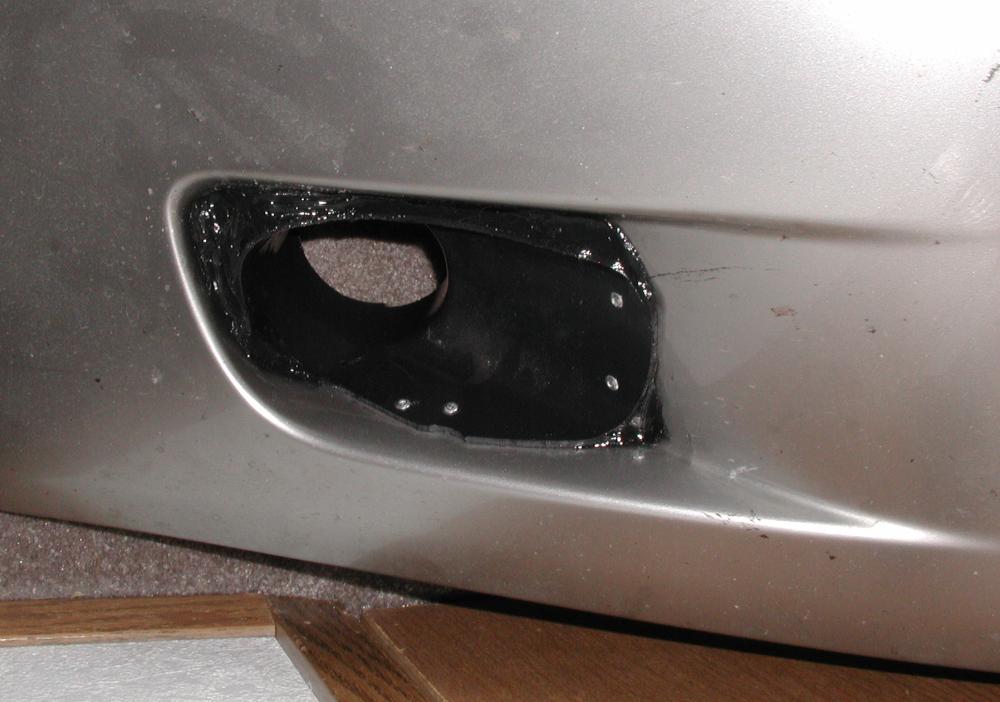 Now you have to modify the bumper
cover. You can see here that I installed a black injection-molded duct that I sort of cut to shape. I didn't do a good job of matching it
to the shape of the bumper, so I used gobs and gobs of RTV (silicone sealant) to fair it in and seal it up. Messy and rather ugly. As I
said above, it would probably be better to just mount a flange behind the faux duct and cut the opening to shape.
Now you have to modify the bumper
cover. You can see here that I installed a black injection-molded duct that I sort of cut to shape. I didn't do a good job of matching it
to the shape of the bumper, so I used gobs and gobs of RTV (silicone sealant) to fair it in and seal it up. Messy and rather ugly. As I
said above, it would probably be better to just mount a flange behind the faux duct and cut the opening to shape.
 Either way, you end
up with a hole in the bumper and something to clamp your duct onto. (I used a scroll saw to cut the bumper plastic and the duct plastic.
I riveted the duct to the bumper, but all that RTV would probably hold it too.)
Either way, you end
up with a hole in the bumper and something to clamp your duct onto. (I used a scroll saw to cut the bumper plastic and the duct plastic.
I riveted the duct to the bumper, but all that RTV would probably hold it too.)
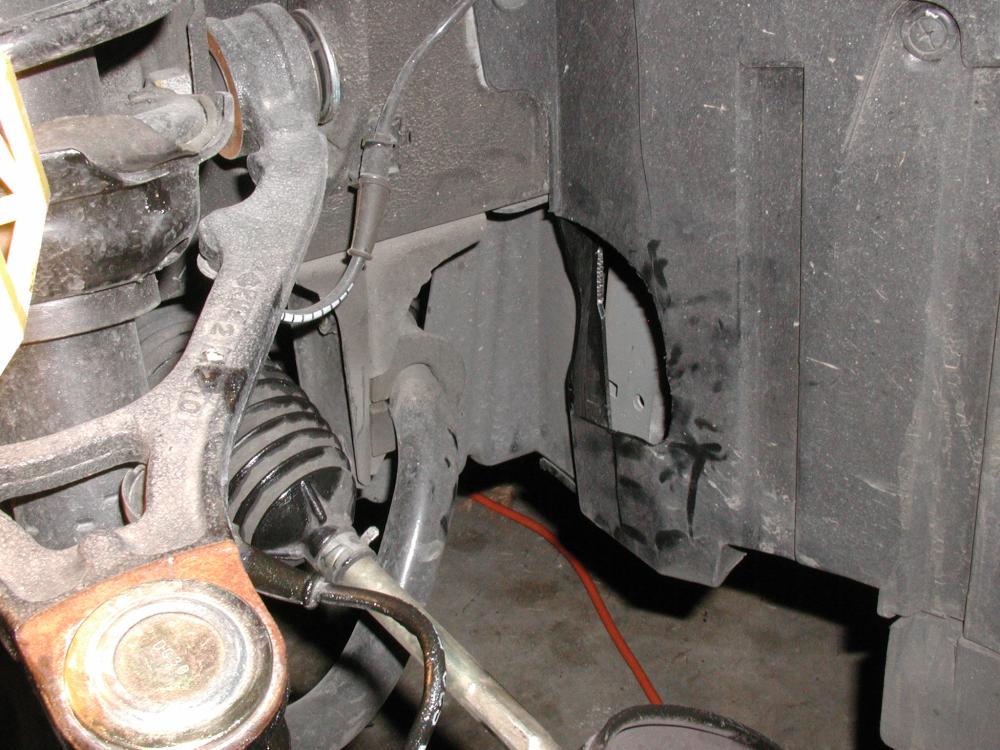
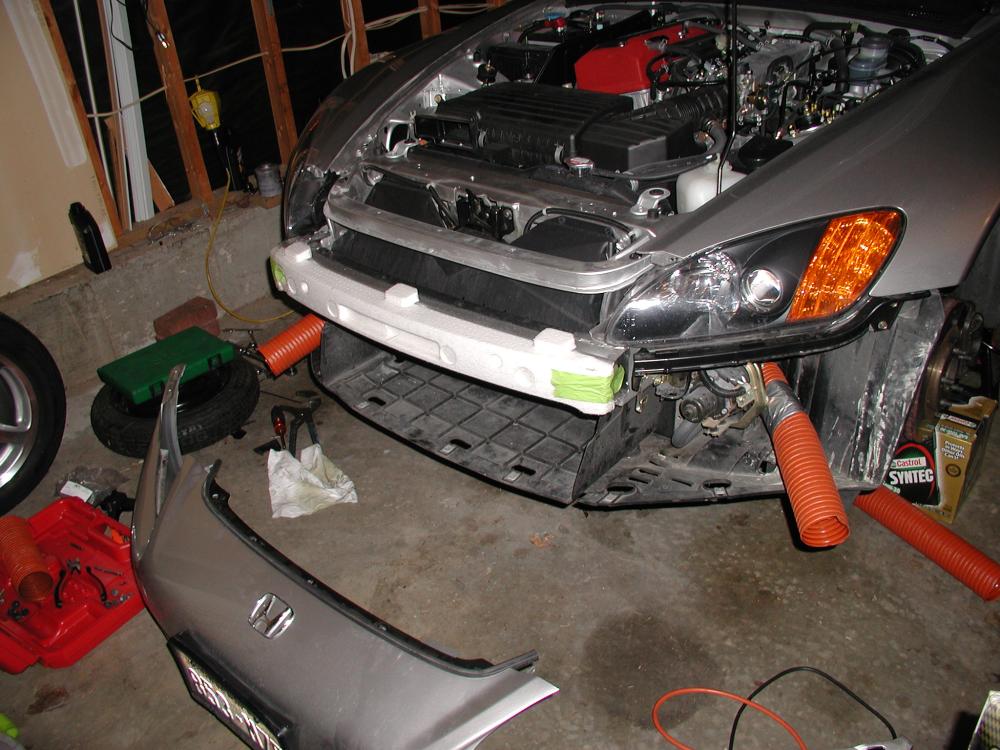
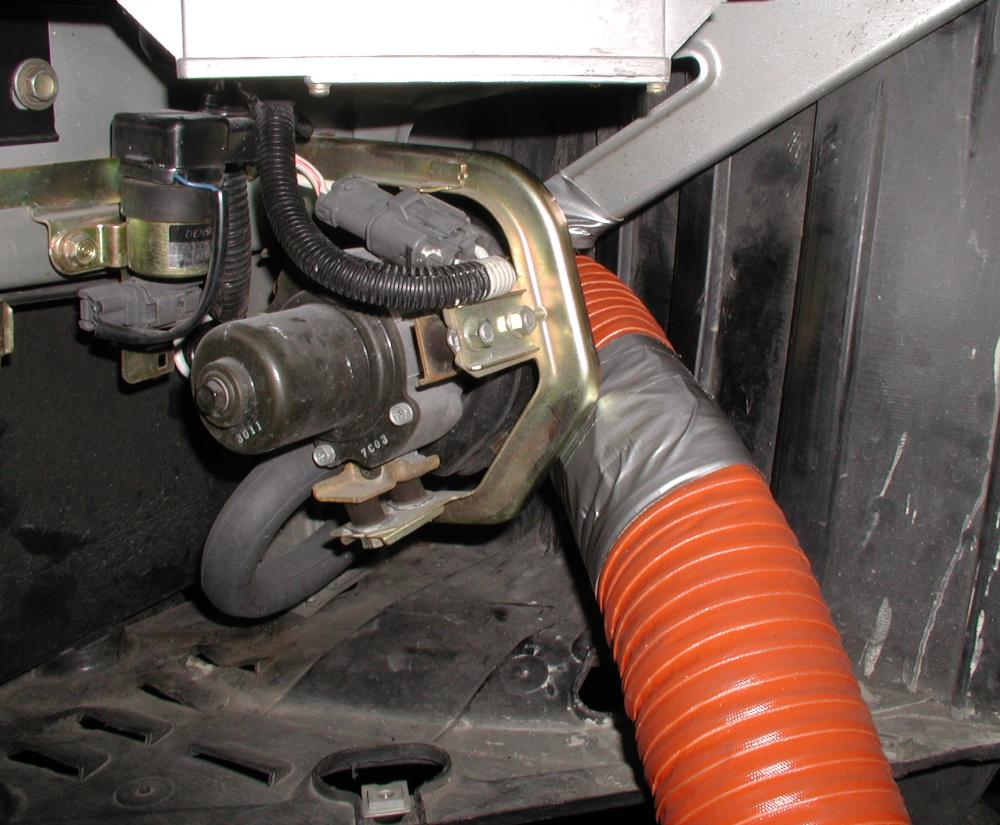 This ugly beasty to the left is the air
pump. (The air pump is an emissions control device.) It sits right where you want to run your ducting on the driver's side. The
passenger's side is a snap compared to the driver's side. You can see where I tried to use some duct tape to help protect the ducting
from some sharp edges.
This ugly beasty to the left is the air
pump. (The air pump is an emissions control device.) It sits right where you want to run your ducting on the driver's side. The
passenger's side is a snap compared to the driver's side. You can see where I tried to use some duct tape to help protect the ducting
from some sharp edges.
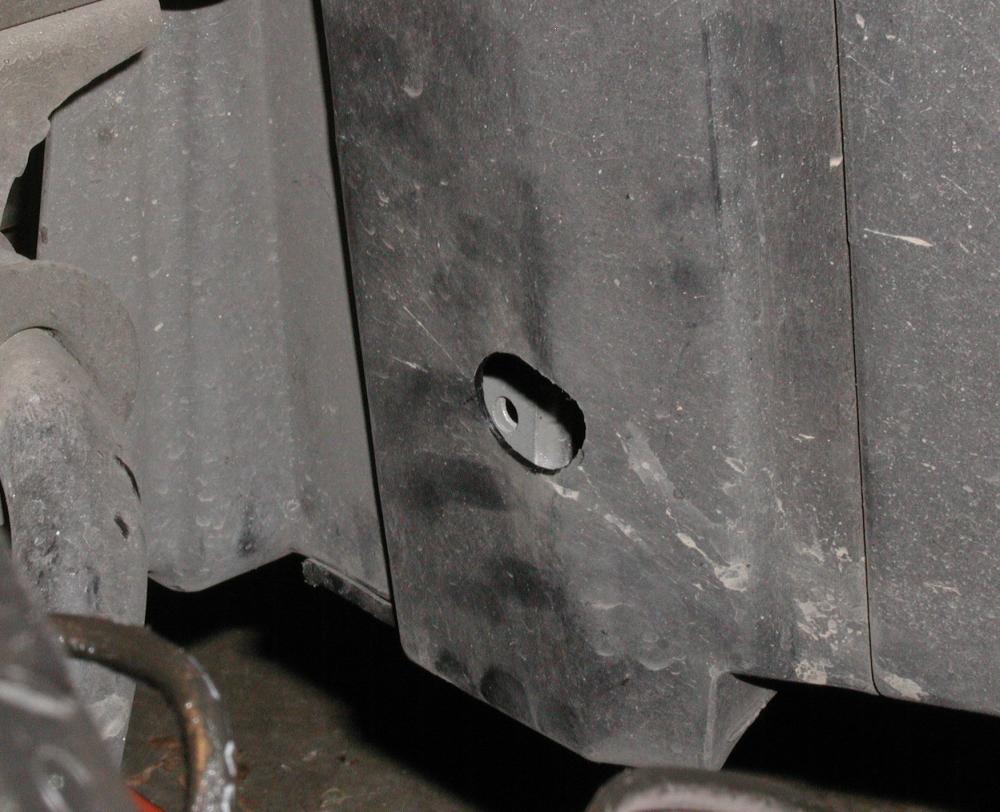 You want to have your ducting come
through the fender liner very close to where the anti-roll bar bracket is. It worked best when I used that drill hole-cutting bit to
make a starter hole.
You want to have your ducting come
through the fender liner very close to where the anti-roll bar bracket is. It worked best when I used that drill hole-cutting bit to
make a starter hole.
 Then I used my knife to expand the
hole. You can't really fit a round three-inch hole through here. Well, you can, but the tire would rub on the ducting. Instead, you need
to flatten the ducting out and give the tire as much room as possible.
Then I used my knife to expand the
hole. You can't really fit a round three-inch hole through here. Well, you can, but the tire would rub on the ducting. Instead, you need
to flatten the ducting out and give the tire as much room as possible.
Remember how I said you have many choices for attaching the duct to the wheel? I used a Dremel tool with a cut-off wheel (or rather, many of them, they break easily) to cut out a somewhat larger hole in the dust shield.
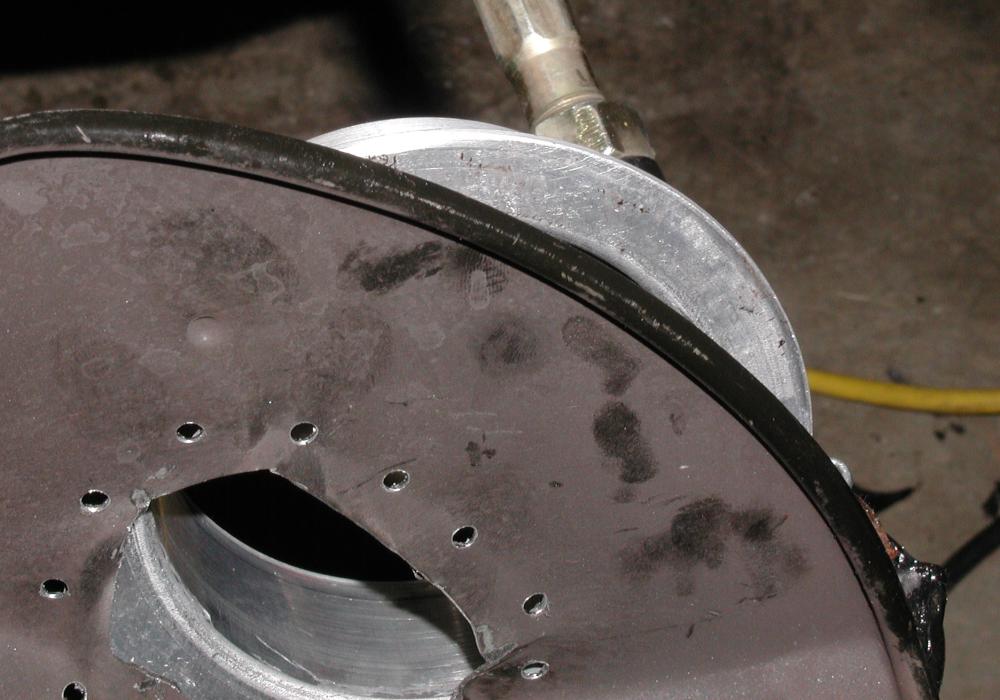 A three-inch diameter flange is
about as big as the whole half of the dust shield. But as long as you don't care about blocking access to the ABS wheel speed sensor, you
can get it in there.
A three-inch diameter flange is
about as big as the whole half of the dust shield. But as long as you don't care about blocking access to the ABS wheel speed sensor, you
can get it in there.
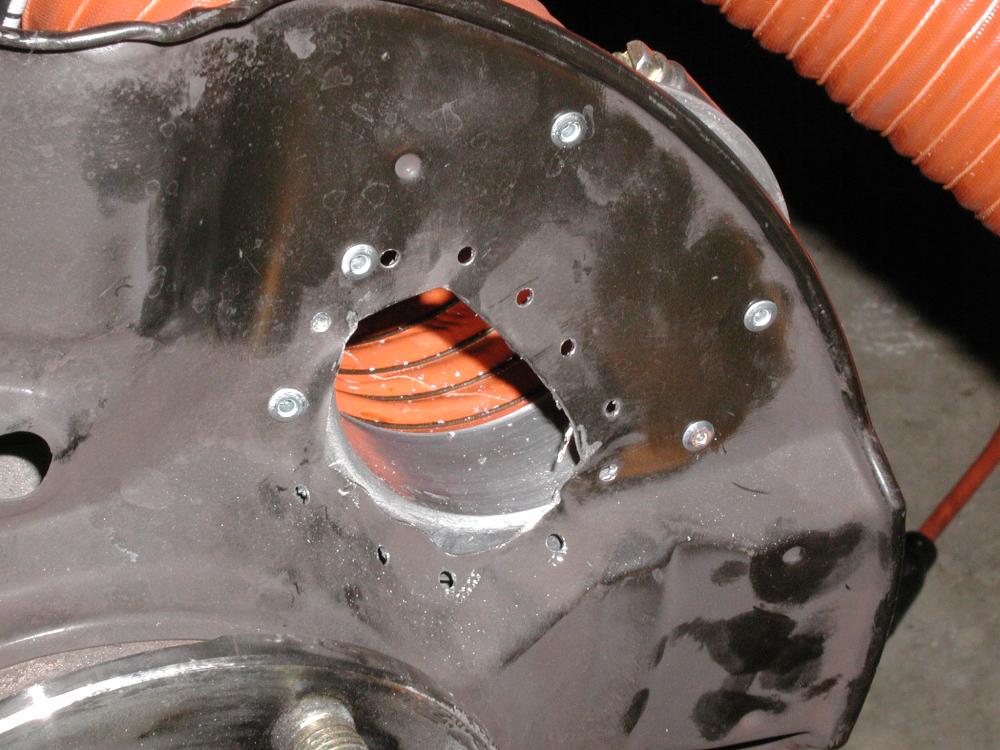 I clamped the flex duct onto
the flange before I installed the flange. I figured that would be easier. (I should be able to get it off there if I ever need to, but it
will be painful to put it back on.) Then I match-drilled and riveted the flange to the dust shield. I used steel rivets. Not sure if that
will turn out to be good or bad. Match-drilling is kind of an art -- it would be great if you could get in from behind, but since you
can't you just have to sort of guess where the right place to drill should be. Some of these problems would be simplified if you mounted
the flange on the inside of the dust shield, but in that case you are committed to the full three inch opening. You can always cut away
more material later, but you can't put it back.
I clamped the flex duct onto
the flange before I installed the flange. I figured that would be easier. (I should be able to get it off there if I ever need to, but it
will be painful to put it back on.) Then I match-drilled and riveted the flange to the dust shield. I used steel rivets. Not sure if that
will turn out to be good or bad. Match-drilling is kind of an art -- it would be great if you could get in from behind, but since you
can't you just have to sort of guess where the right place to drill should be. Some of these problems would be simplified if you mounted
the flange on the inside of the dust shield, but in that case you are committed to the full three inch opening. You can always cut away
more material later, but you can't put it back.

 I figured it would be handy to be able to open up the duct in the wheel well if I
needed to (possibly to replace the exposed part) so I used some dryer-ducting hardware to splice the duct right after it enters the wheel
well. Then I zip-tied it to the upper arm where I thought it would be out of the way. I was wrong.
I figured it would be handy to be able to open up the duct in the wheel well if I
needed to (possibly to replace the exposed part) so I used some dryer-ducting hardware to splice the duct right after it enters the wheel
well. Then I zip-tied it to the upper arm where I thought it would be out of the way. I was wrong.
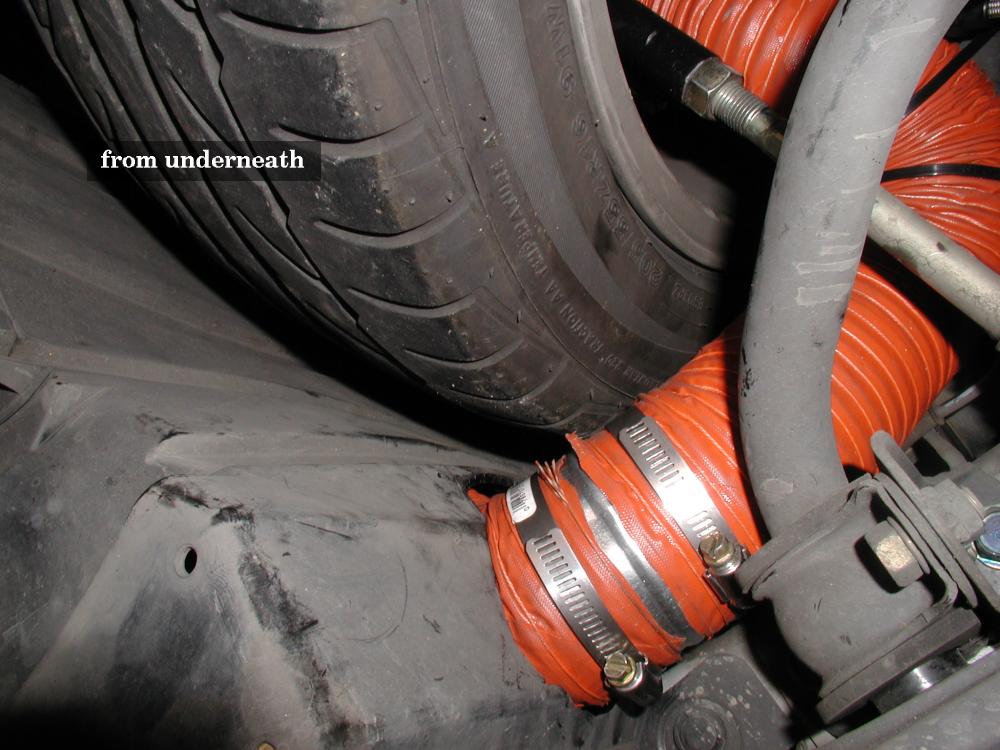 When I mounted my tire, I rubbed in
three spots. I ended up cutting away more of the fender liner next to the anti-roll bar, squeezing the duct into a more rectangular shape
(that metal bit in there was good for that), and changing where I attached the zip-ties. I ended up with a zip-tie around the strut on
the bit going vertically up from the flange and only one zip-tie on the upper arm. That helped me get the duct tucked in underneath the
upper arm instead of next to it. When I was done I was able to get full steering lock in both directions with no rubbing (stock tires and
wheels).
When I mounted my tire, I rubbed in
three spots. I ended up cutting away more of the fender liner next to the anti-roll bar, squeezing the duct into a more rectangular shape
(that metal bit in there was good for that), and changing where I attached the zip-ties. I ended up with a zip-tie around the strut on
the bit going vertically up from the flange and only one zip-tie on the upper arm. That helped me get the duct tucked in underneath the
upper arm instead of next to it. When I was done I was able to get full steering lock in both directions with no rubbing (stock tires and
wheels).
[When I later took my car in and got it realigned, the passenger side duct started rubbing again (only at full steering lock). Obviously some trial and error is necessary to get everything set up just perfectly.]
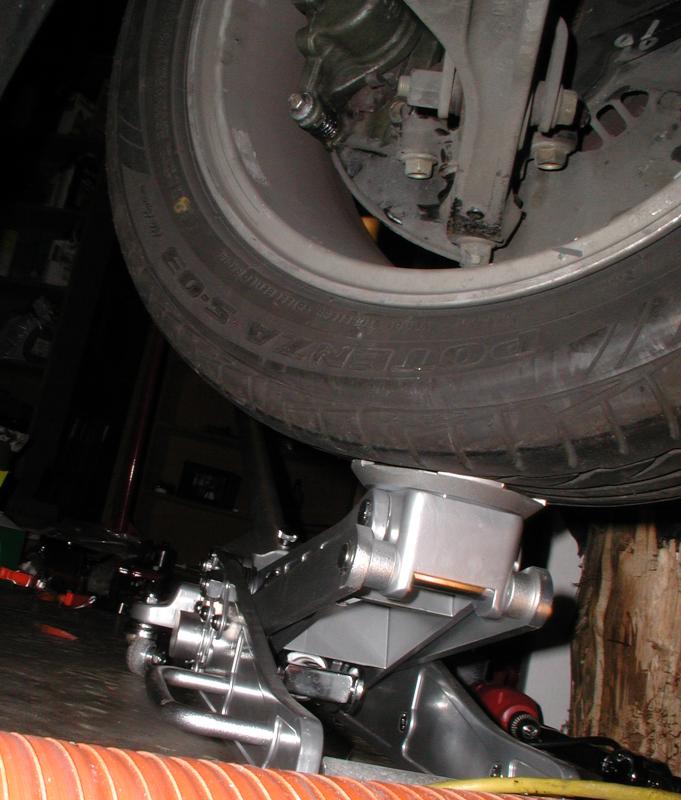 Then I put the
jack under the wheel to compress the suspension and make sure that wasn't a problem. In fact, I had more clearance. A two-inch duct would
be a snap to fit, and a 2.5 inch duct would be easier than a three inch duct. I don't know how big of a front tire size you could run
with a three inch duct!
Then I put the
jack under the wheel to compress the suspension and make sure that wasn't a problem. In fact, I had more clearance. A two-inch duct would
be a snap to fit, and a 2.5 inch duct would be easier than a three inch duct. I don't know how big of a front tire size you could run
with a three inch duct!
Once the bit in the wheel well is where you want it, you need to reattach the bumper.
 The problem is
that if you cut the ducting too short you can't get in there to attach it. But if you cut it too long you can't compress it enough. You
have a lot more leeway for this on the passenger side, so keep that in mind.
The problem is
that if you cut the ducting too short you can't get in there to attach it. But if you cut it too long you can't compress it enough. You
have a lot more leeway for this on the passenger side, so keep that in mind.
 It helps
to have something to sit the bumper on at the right height. Then just work everything back into place. (I could have gotten closer --
this was barely short enough to fit on the drivers side. It would have been fine on the passenger's side.)
It helps
to have something to sit the bumper on at the right height. Then just work everything back into place. (I could have gotten closer --
this was barely short enough to fit on the drivers side. It would have been fine on the passenger's side.)
 And finally, you are finished!
I asked many people if there needed to be screens on the inlets, and they all said no. So I didn't put any on. However, it would be possible.
The many people on S2KI who covered this ground before me, and posted their brake duct solutions. Mine is only one possible way to do it, but since I learned something from every other description, I thought someone else might learn something from mine.
Email address:
mikegarrison@alum.mit.edu
This address forwards to both home
and work. I get a lot of spam, so if I don't know you, be sure to have a descriptive subject line.