( click images to enlarge )
|
|
|
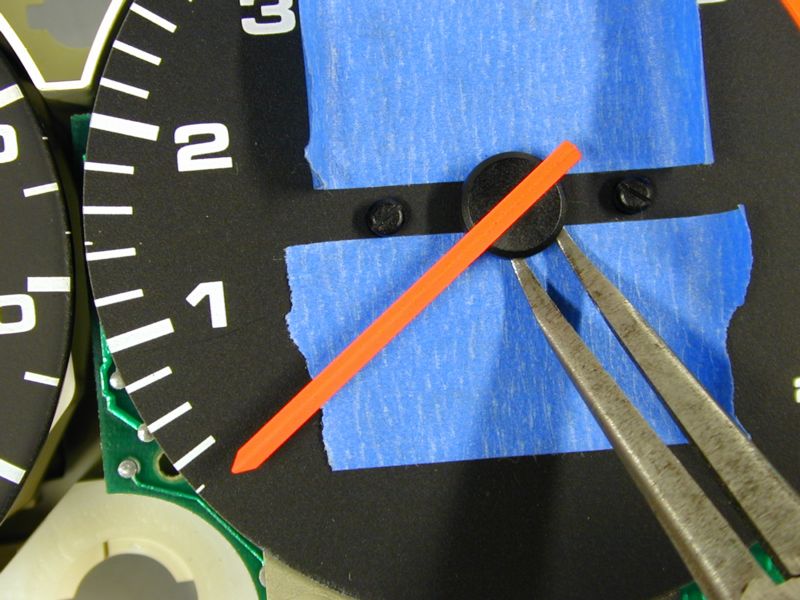
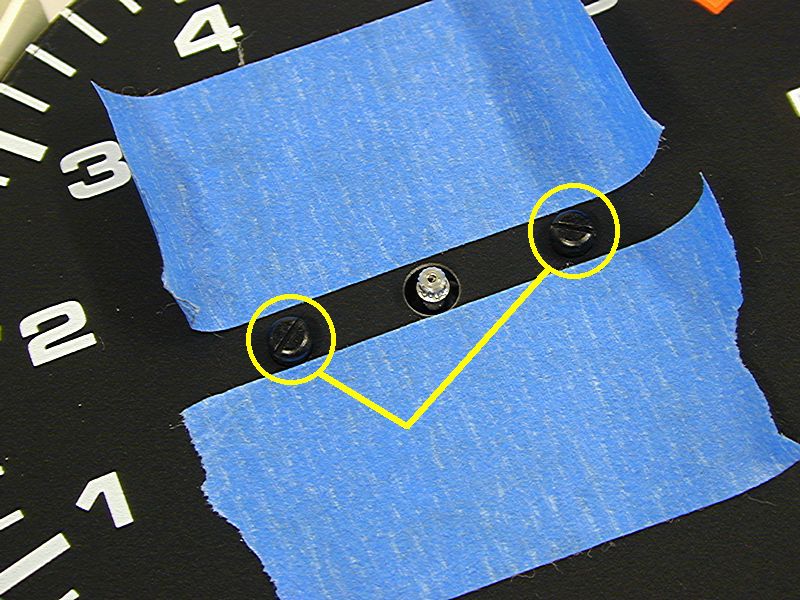
Tachometer disassembly - Use masking take to avoid marring the gauge face and carefully pry the tach needle from the shaft. Remove 2 screws holding the tach face. Remove 2 screws holding the backing plate. |
|
|
|
|
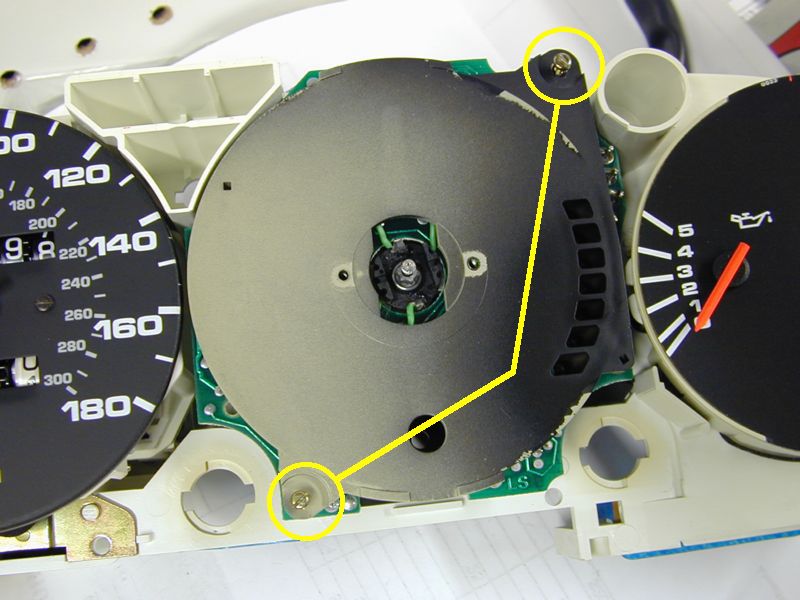
Tachometer disassembly - Remove 5 nuts and 3 screws from back of tach. Remove tach from gauge housing.
|
|
|
|
|
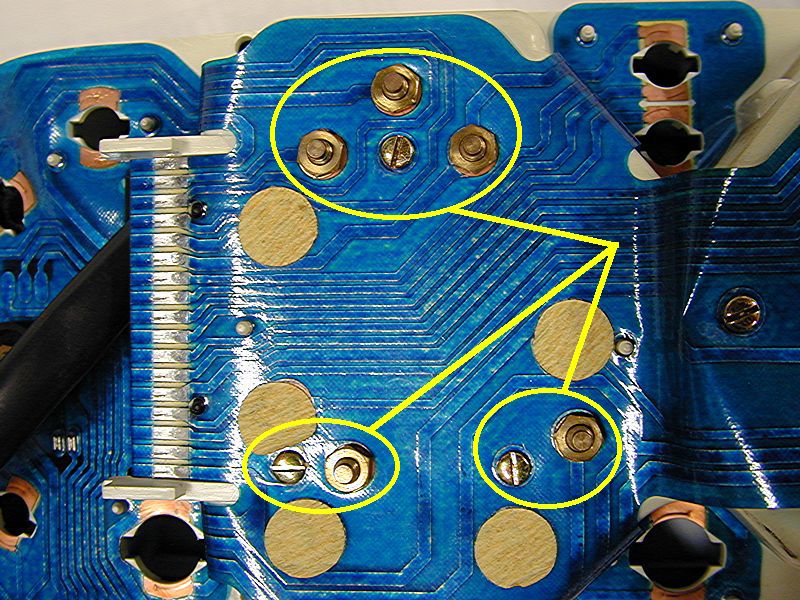
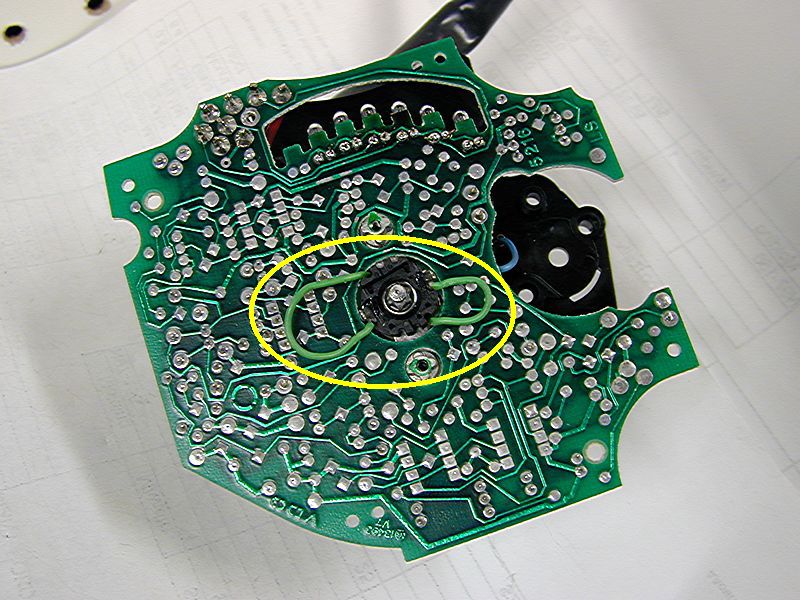
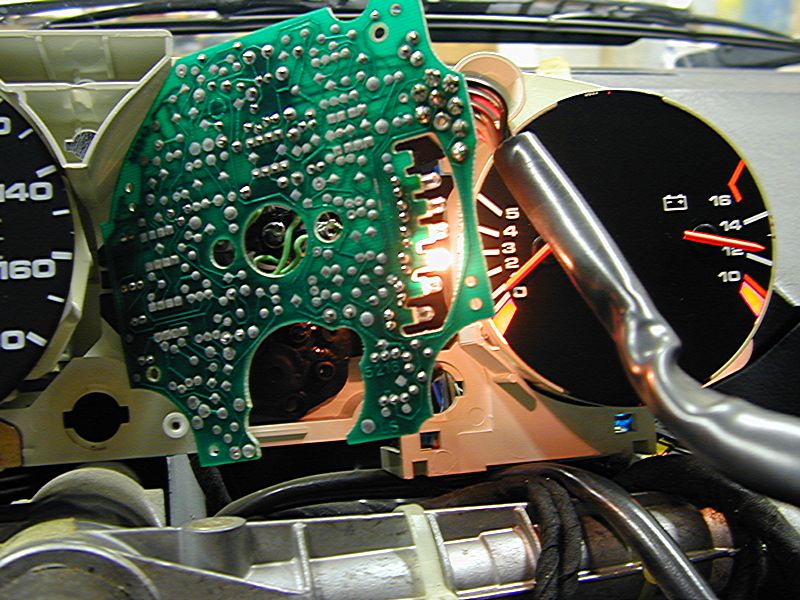
Tachometer disassembly - Separate circuit board from tach body, pulling 2 green wires up to go thru hole. Disconnect the 5 wires from circuit board to tach body. |
|
|
|
|
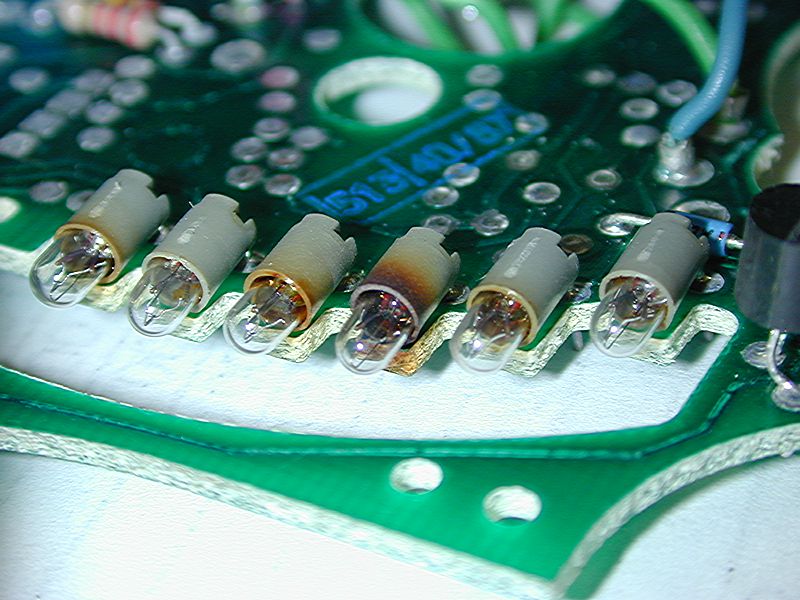
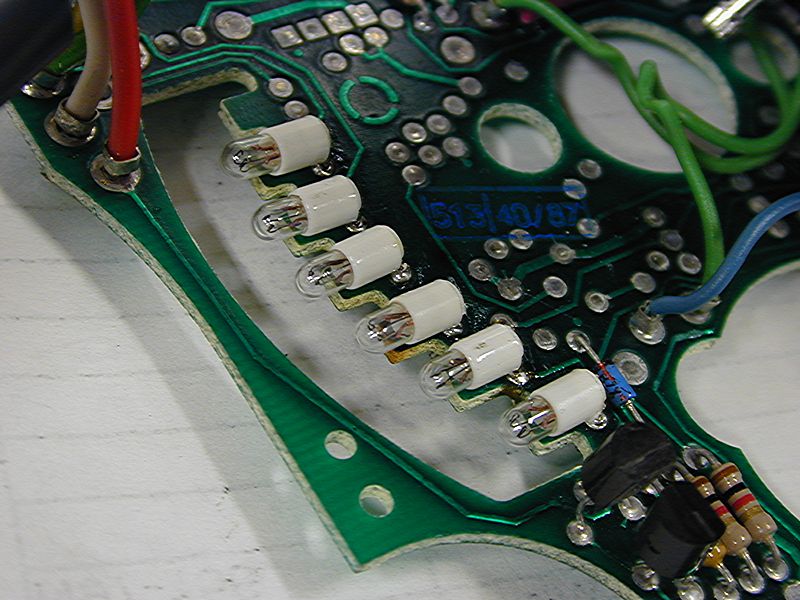
Gear indicator bulbs - Desolder and remove old gear indicator bulbs... ...and solder in new gear indicator bulbs. ( Radio Shack P/N 272-1154 ) |
|

|
|
|
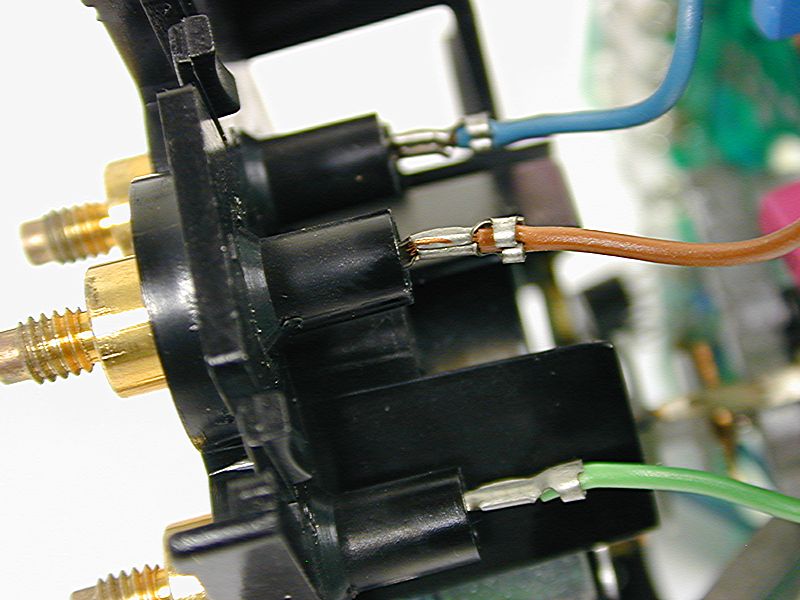
Tachometer wiring - Slightly squeeze connectors for sug connection then re-attach to terminals.
|
|
|
|
|
Test lights - Reinstall tach body into gauge housing to test the new bulbs before completely reassembling tach onto gauge housing. All 4 gauge cluster connectors must be re-attached for this. Reverse order to re-assemble. Back To Gauges Forward To Lights |